TOMCAT(WAS)에서 HTTPS 설정하기
1. key 생성
- keytool 사용
- Windows 환경에서는 CMD에서 작업
key 생성 명령어
- keystore가 존재한다면 옵션
-keystore뒤에 keystore 이름 표기, 없다면 생성할 keystore 파일명 표기
keytool -genkeypair -v -keystore .keystore -alias tomcat_key -keyalg RSA -keysize 1024 -validity 100000
- 키 저장소(keystore)의 비밀번호 입력
- 이름과 성 입력
- 조직 단위 이름 입력
- 조직 이름 입력
- 구/군/시 이름 입력
- 시/도 이름 입력
- 이 조직의 두 자리 국가 코드 입력
- Y 입력 (확인)
위의 과정이 완료되면 .keystore keystore에 tomcat_key라는 key가 생성된다.
생성된 keystore에 등록된 key 확인
keytool -list
- keystore 기본값 :
.keystore - keytore에 별도의 이름 부여시
-keystore옵션 사용keytool -keystore 이름.keystore -list
[결과]
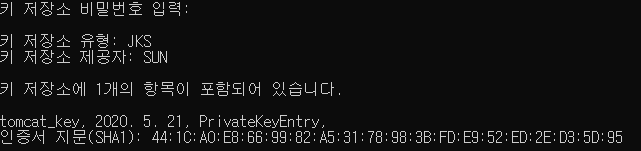
- 옵션
-alias로 등록된 이름의 key가 목록에 있는 것을 확인할 수 있다.
2. TOMCAT 설정
TOMCAT의 server.xml 설정
<Connector SSLEnabled="true" clientAuth="false" keystoreFile="C:/Users/.keystore" keystorePass="changeit" maxThreads="150" port="8443" protocol="HTTP/1.1" scheme="https" secure="true" sslProtocol="TLS"/>
- TOMCAT의
server.xml에 위의Connector를 추가한다.- Eclipse 경로: Servers > Tomcat Server at localhost-config > server.xml
Connector의 keystore 파일 경로, 비밀번호 설정- keystoreFile : “keystore 경로”
- keystorePass : “keystore 비밀번호”